Princess Barrette Organizer
by Shirley Rufener, CPD
Shirley's website: www.shirleyrufener.com
Materials:
- Delight™ air dry modeling compound
- Acrylic roller tool or smooth drinking glass
- Kitchen plastic wrap or waxed paper
- Round toothpick
- Plastic coffee stir (mini straw) or pencil tip
- Large crown cookie cutter or simple coloring book drawing
- Small heart cutter (or cut one from paper)
- 1 1/3 yards (same as 4 feet) of 5/8" wide printed grosgrain ribbon
- Acrylic paints to match ribbon: I used white + turquoise, avocado + yellow
- White paint pen or gel pen
- White tacky glue
- Flat paintbrushes (1/2" and 1/4" wide)
- Fine liner brush
- Paper towels
- Brush-on waterbased satin varnish (for over acrylic paint)
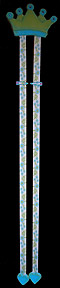
Little girls love to collect lots of barrettes to match their clothes. This project will help organize those accessories and keep them all together so they don't get lost. Two long ribbons hold sets and single barrettes so they can be easily accessed by kids and moms. This is an easy beginner project that even the kids themselves can create with a little supervision from a parent, and they make wonderful gifts as well!
Instructions:
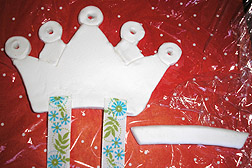
1. Roll a 1/4" thick sheet of Delight on plastic wrap. Cut out the crown shape and remove excess clay around it. Place scraps in an airtight container to keep moist. Impress any design detail lines using a toothpick. Use the mini straw to punch holes in points of crown so it can be hung on a wall. Cut two, 2 feet long (24") pieces of ribbon. Make sure they are the same length. Roll a log of clay and flatten it to 1/2" wide for the name, with the length measuring the same width as the base of the crown. Place a 3/8" area of the end of the ribbons over the crown base as shown, 1 1/4" apart, and secure to base with tacky glue.
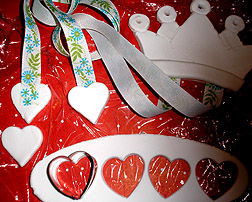
2. Secure the clay banner over the crown base and ribbon with tacky glue and allow glue to dry for 15 minutes. Roll another 1/4" thick sheet of Delight on plastic wrap and cut out 4 heart shapes. Secure the bottom 1/2" area of the ends of the ribbons over the top half of the backside of two hearts. Apply glue to the backside of the third and fourth hearts and place it on top of the ribbon and the clay hearts. Place the project on a piece of screen if you have one, and allow the Delight to dry overnight or longer. The clay will have a little give but will feel dry and very lightweight when ready to paint.
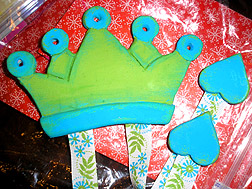
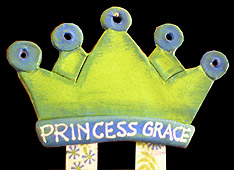
3. Paint the crown surface with one color (green), and the crown tips, crown banner and the surface and side edges of all 4 hearts with your second color. Use a smaller flat paintbrush or a liner brush to paint hard to reach areas. Allow paint to dry, then place on a clean piece of plastic and paint the backside of crown as desired for a finished look. Clean the paintbrush and allow it to dry. Dip into first color (green) and dab off most of the paint onto a paper towel. "Dry-brush" the edges and details of the project and let the paint dry. Brush on a coat of varnish over painted areas, avoiding the ribbon, and allow finish to dry. Write name on banner as desired.